

DoorDash’s Item Modal, one of the most complex components of our app and web frontends, shows customers information about items they can order. This component includes nested pages, dynamic rendering of input fields, and client-side validation requirements.
Our recent migration to a microservices architecture gave us the opportunity to rethink how we manage the Item Modal on our React-based web frontend. Working under the constraint of not wanting to add a third-party package, we adopted what we call the Class Pattern, a twist on the vanilla, out-of-the-box React state management pattern.
Reengineering our Item Modal using the Class Pattern increased reliability, extended testability, and helped map our mental model of this component.
Finding the best React state management pattern to buy into
The first thing every React engineer does after typing npx create-react-app my-app is almost always googling something like “how to manage react state”, followed by “best react state management libraries”.
These Google searches fill the screen with so many different articles about countless different React state management frameworks, such as React Redux, Recoil, and MobX, that it’s difficult to decide which one to buy into. The rapidly-changing landscape can mean that choosing one ${insert hype state management framework} today will require upgrading to another ${insert even more hype state management framework} tomorrow.
In early 2019 we rebuilt our web application, basing the tech stack on TypeScript, Apollo/GraphQL, and React. With many different teams working across the same pages, each page had its own unique way of managing state.
The complexity of building the Item Modal forced us to rethink how we manage state on our complex components. We used the Class Pattern to help organize state in the Item Modal so that business logic and display logic are easily to differentiate. Rebuilding the Item Modal based on the Class Pattern would not only increase its availability to customers, but also serve as a model for other states in our application.

Introducing our React state management pattern: The Class Pattern
Before we discuss how we utilized a react state management pattern let's explain what the Class Pattern is and how we came about using it. When we were tasked with rebuilding the Item Modal, the data structure returned from the backend was a nested JSON tree structure. We quickly realized that the data could also be represented as a N-ary tree in state with three distinct node types:
ItemNodeOptionListNodeOptionNode.
With the Class Pattern, we made the rendering and state very easy to understand and allowed the business logic to live directly on the nodes of the Item Modal.
At DoorDash, we haven’t standardized on any state management framework, and most commonly use useState/useReducer combined with GraphQL data fetching. For the previous iteration of our Item Modal, we leveraged two useReducers: ItemReducer to manage GraphQL’s data fetching and ItemControllerReducer to manage the Item Modal’s state from UI interactions.
The dynamic nature of the Item Model requires many different types of functions called with every single reducer action. For example, building an instance of the Item Modal for a customer dispatches an initiate action to handle the data response in ItemReducer. Following that, the Item Modal dispatches an initiate action with the ItemReducer’s state to ItemControllerReducer, where we prepare the state and perform recursive validation.
It was easy to write integration tests by running our reducer and dispatching actions, then checking the end result. For example, we could dispatch a building Item Modal action with mock data and check to see if the state on ItemReducer and ItemControllerReducer was correct. However, Item Modal’s smaller moving parts and business logic were more difficult to test.
We wanted to make running unit tests on new Item Modal features faster and easier. In addition, making all our current features unit testable meant we could easily test every new feature and avoid any regressions.
Creating the Class Pattern made testing the business logic extremely simple, requiring no third-party packages and no need to maintain our unidirectional data flow with useReducer.
To introduce this pattern, we’ve built a simple to-do list example:
Starting with a simple to-do list example
Extracting the business logic from the reducer used in useReducer to an ES6 class, TodoState, helps when creating a no-setup unit test.
Implementing TodoState
In TodoState, we utilize TypeScript’s private and public functions and variables to set a clear delineation of what is internal to TodoState and what should be externally exposed. Private functions should only be called by handleTodoAction, which is described in the paragraph below, or by other internal functions. Public functions consist of handTodoAction and any selector functions that expose the state to any consumers of TodoState.
handleTodoAction should look extremely familiar to a typical reducer example accepting an action and determining what internal functions to call. In handleTodoAction, a TodoAction matches to a case in the switch statement and triggers a call to one of the private methods on TodoState. For example, setTodoDone or addTodo will make a mutation to the state, but can only be called by handleTodoAction.
public handleTodoAction = (todoAction: TodoAction) => {
   switch (todoAction.type) {
     case TodoActionType.ADD_TODO: {
       this.addTodos(todoAction.todo);
       return;
     }
     case TodoActionType.SET_TODO_DONE: {
       this.setTodoDone(todoAction.todoIndex, todoAction.done);
       return;
     }
   }
 };
todos is stored in TodoState as a private variable that can be retrieved using the public method getTodos. getTodos is the other public method and acts similarly to a selector from other state management frameworks, such as Redux.
 public getTodos = () => {
   return this.todos;
 };
Since getTodos is a public method, it can call any private method but would be an anti-pattern as the other public methods other than handleTodoAction should only select state.
Building a custom useTodo useReducer hook
We create a custom useTodo hook that wraps the useReducer hook by only exposing what the consumer of the useTodo hook needs: the todos and actions addTodo and setTodoDone.
export const useTodo = () => {
 const [todoState, dispatch] = useReducer(TodoReducer, new TodoState());
 const addTodo = (todo: Todo) => {
   dispatch({ type: TodoActionType.ADD_TODO, todo });
 };

 const setTodoDone = (todoIndex: number, done: boolean) => {
   dispatch({ type: TodoActionType.SET_TODO_DONE, todoIndex, done });
 };
 const todos = todoState.getTodos();
 return { todos, addTodo, setTodoDone };
};
Click here to see the entire code sample in CodeSandbox.
We can then make a shallow copy using Object.assign({}, todoState) to prevent side effects on the previous state and preserve typing, then offload the typical reducer logic to the TodoState’s handleTodoAction function, and finally return the newTodoState.
const TodoReducer: Reducer<TodoState, TodoAction> = (todoState, todoAction) => {
 const newTodoState = Object.assign({}, todoState);
 newTodoState.handleTodoAction(todoAction);
 return newTodoState;
};
Implementing Unit Tests
As mentioned above, we designed the Class Pattern to make business logic tests easy, which we can demonstrate with TodoState. We’re able to test every line of TodoState very easily with absolutely no prior setup. (Although we do leverage CodeSandbox’s Jest setup.)
We test the business logic and verify side effects by utilizing handleTodoAction and public selector methods (getTodos in this instance), similar to how any consumer would ultimately interact with the TodoState. We don’t even need React for these tests because TodoState is purely decoupled and written in JavaScript. This means we don’t have to fumble with looking up how to render hooks in tests or find out that a third party package needs to be upgraded to support writing unit tests.
it("addTodo - should add todo with text: Snoopy", () => {
   const todoState = new TodoState();
   todoState.handleTodoAction({
     type: TodoActionType.ADD_TODO,
     todo: {
       text: "Snoopy",
       done: false
     }
   });
   const todos = todoState.getTodos();
   expect(todos.length).toBe(1);
   expect(todos[0].text).toBe("Snoopy");
 });
Click here to see the unit tests in CodeSandbox.
Putting useTodo and TodoState together in the UI
The code sample below is a very simple contrived UI demonstrating how simple interactions with the state become when using the Class Pattern.
The TodoList component calls the useTodo hook to get the todos alongside the addTodo and setTodoDone functions.
const { todos, addTodo, setTodoDone } = useTodo();Click here to see the code sample in CodeSandbox.
The markup that we return is really simple, as we only need to map the todos from useTodo. With the class pattern, we can keep the markup really simple even in the more complicated Item Modal example in the next section.
{todos.map((todo: Todo, index: number) => {
         return (
           <div
             key={index}
             style={{
               display: "flex",
               alignItems: "center"
             }}
           >
             {todo.text}
             <input
               type="checkbox"
               onChange={toggleTodoDone(index, todo)}
               checked={todo.done}
             />
           </div>
         );
       })}
Click here to see the code sample in CodeSandbox.
Next, we create event handlers. We will use handleAddTodo and toggleTodoDone for button click and checkbox change actions.
const handleAddTodo = () => {
   addTodo({
     text: todoInputText,
     done: false
   });
   resetTodoInputText();
 };

 const toggleTodoDone = (todoIndex: number, todo: Todo) => () => {
   setTodoDone(todoIndex, !todo.done);
 };
In TodoList, we attach handleAddTodo to the onClick of the button. When the button is clicked a few things happen to render the new todo onto TodoList, as shown in Figure 2, below.
<button onClick={handleAddTodo}>Add Todo</button>Click here to see the code sample in CodeSandbox.

TodoList- Button click fires offhandleAddTodohandleAddTodo- We use the current value of the todoInputText to create a todo data payload. Then,addTodo(exposed via theuseTodohook) is called with this todo data payload.addTodo- dispatches anAddTodoTodoActionto theTodoReducerwith thetodo data payload.- TodoReducer - makes a new copy of the current state and calls TodoState’s
handleTodoActionwith theTodoAction. handleTodoAction- determines that theTodoActionis anAddTodoaction and calls the private functionaddTodoto add the todo data payload to todos and returns.- TodoReducer - new copy of the current state now also includes the updated
todosand returns the new state
Inside the useTodo hook, we use TodoState’s getTodos to select the updated todos on TodoState and returns it to the client.
The client detects state change and re-renders to render the new todos on TodoState
How we use the Class Pattern in the Item Modal
As mentioned above, there are a lot of moving parts in the Item Modal. With our rebuild, we’ve consolidated the two reducers into one, TreeReducer, to handle the data fetching and consolidation (initial item request and nested option requests) and keep the item state, such as item quantity, running price, and validity.
Consolidation to one reducer makes the larger integration tests straightforward and allows us to have all the actions in one place. We use the Class Pattern alongside the TreeReducer to construct a TreeState, similar to the TodoState we went over above.
Our TreeState exposes a handleTreeAction public function that handles all incoming actions and triggers a series of function calls.
Describing TreeState
The most important characteristic of the Item Modal rebuild is that it is a TreeState, which is represented as an N-ary tree, as shown in Figure 3, below:

The recursive nature of the Item Modal and its nodes is similar to a Reddit post’s comment section. A comment can have child comments, which have child comments, and so on. But for the Item Modal, each node has a different responsibility.
Implementing ItemNode
An ItemNode holds the item’s information, including name, ID, description, price, and imageUrl. An ItemNode is always the TreeState’s root and its children are always OptionListNodes.
export class ItemNode {
 private imageUrl?: string;
 private name: string;
 private id: string;
 private isValid: boolean;
 private children: OptionListNode[];
 ...
}
Click here to see the code sample in CodeSandbox.
For all of the ItemNode’s public methods, we can easily write tests for all of their business logic by just adding OptionListNode’s as children and testing the validation.
it("should be valid if all of its OptionListNodes are valid", () => {
     const optionListNode = new OptionListNode({
       id: "test-option-list",
       name: "Condiments",
       minNumOptions: 0,
       maxNumOptions: 9,
       selectionNode: SelectionNodeType.SINGLE_SELECT,
       parent: itemNode
     });
     optionListNode.validate();
     expect(itemNode.getIsValid()).toBe(true);
   });
Click here to see the rest of the unit tests in CodeSandbox.
Implementing OptionListNode
An OptionListNode keeps track of all the validation boundary conditions and determines what type of options to render in the Item Modal. For example, if a user selected a pizza on the web application, OptionListNode might initiate a multi-select option list requiring selection of a minimum of two but a maximum of four topping options. An OptionListNode’s children are OptionNodes, and its parent node can be either an ItemNode (normal case) or an OptionNode (nested option case).
export class OptionListNode {
 private id: string;
 private name: string;
 private minNumOptions: number;
 private maxNumOptions: number;
 private selectionNode: SelectionNodeType;
 private parent?: ItemNode | OptionNode;
 private children: OptionNode[];
 private isValid: boolean;
...
}
Click here to see the code sample in CodeSandbox.
The OptionListNode handles most of the critical business logic in determining client side error states to ensure a user is submitting a valid item in the correct format. It’s validate method is more complicated than OptionNode and ItemNode and we need to check if the node satisfies the boundary rules. If the user does not follow the merchant’s item boundary configuration rules the OptionListNode will be invalid and the UI will provide an error message.
public validate = () => {
   const validSelectedOptions = this.children.filter(
     (optionNode) => optionNode.getIsSelected() && optionNode.getIsValid()
   ).length;
   this.isValid =
     this.satisfiesMinNumOptions(validSelectedOptions) &&
     this.satisfiesMaxNumOptions(validSelectedOptions);

   this.parent?.validate();
 };
We can easily test this validate logic for an OptionListNode that requires a minNumOptions >= 1 by adding OptionNodes and then calling select.
describe("OptionListNode", () => {
  let optionListNode: OptionListNode = new OptionListNode({
   id: "test-option-list",
   name: "Condiments",
   minNumOptions: 1,
   maxNumOptions: 9,
   selectionNode: SelectionNodeType.SINGLE_SELECT
 });
  beforeEach(() => {
   optionListNode = new OptionListNode({
     id: "test-option-list",
     name: "Condiments",
     minNumOptions: 1,
     maxNumOptions: 9,
     selectionNode: SelectionNodeType.SINGLE_SELECT
   });
 });

  describe("validate", () => {
   it("should not be valid with no OptionNode children", () => {
     optionListNode.validate();
     expect(optionListNode.getIsValid()).toBe(false);
   });
   it("should be valid if one OptionNode is selected and is valid", () => {
     const optionNode = new OptionNode({
       parent: optionListNode,
       id: "test",
       name: "ketchup"
     });
     optionNode.select();
     optionListNode.validate();
     expect(optionListNode.getIsValid()).toBe(true);
   });
   it("should not be valid if no OptionNodes are selected", () => {
     const optionNode = new OptionNode({
       parent: optionListNode,
       id: "test",
       name: "ketchup"
     });
     optionListNode.validate();
     expect(optionListNode.getIsValid()).toBe(false);
   });
 });
}
Click here to see the rest of the unit tests in CodeSandbox.
Implementing OptionNode
An OptionNode keeps track of its selection state, price, name, and, optionally, a nextCursor. An OptionNode with a nextCursor indicates that there are nested options.
export class OptionNode {
 private id: string;
 private name: string;
 private nextCursor?: string;
 private children: OptionListNode[];
 private isSelected: boolean;
 private isValid: boolean;
 private parent?: OptionListNode;
…
}
Click here to see the code sample in CodeSandbox.
Rather than build an entire tree, we can isolate the test to the OptionNode and its immediate parent and children.
We can test some pretty complicated behavior like when we select an OptionNode, it will unselect all of its sibling OptionNodes if it is a SINGLE_SELECT.
describe("OptionNode", () => {
 let optionNode = new OptionNode({
   name: "Test",
   id: "test-option"
 });
 beforeEach(() => {
   optionNode = new OptionNode({
     name: "Test",
     id: "test-option"
   });
 });
  describe("select", () => {
    it("if its parent is a SINGLE_SELECTION option list all of its sibling options will be unselected when it is selected", () => {
     const optionListNode = new OptionListNode({
       id: "test-option-list",
       name: "Condiments",
       minNumOptions: 1,
       maxNumOptions: 9,
       selectionNode: SelectionNodeType.SINGLE_SELECT
     });
     const siblingOptionNode = new OptionNode({
       id: "sibling",
       name: "Ketchup",
       parent: optionListNode
     });
     const testOptionNode = new OptionNode({
       id: "Test",
       name: "Real Ketchup",
       parent: optionListNode
     });
     expect(siblingOptionNode.getIsSelected()).toBe(false);
     expect(testOptionNode.getIsSelected()).toBe(false);
     siblingOptionNode.select();
     expect(siblingOptionNode.getIsSelected()).toBe(true);
     expect(testOptionNode.getIsSelected()).toBe(false);
     testOptionNode.select();
     // should unselect the sibling option node because its parent is a single select
     expect(siblingOptionNode.getIsSelected()).toBe(false);
     expect(testOptionNode.getIsSelected()).toBe(true);
   });
 });
 });
Click here to see the code sample in CodeSandbox.
Click here to see the rest of the unit tests in CodeSandbox.
TreeState
TreeState keeps track of the root of the N-ary tree (an ItemNode), a key value store that allows O(1) access to any node in the tree, and the current node for pagination purposes.
TreeState’s handleTreeAction interacts directly with the ItemNodes, OptionListNodes, and OptionNodes.
Visualizing the TreeState with a burrito ordering example
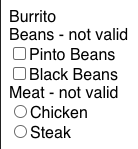
To better visualize these different nodes, let’s take a look at a burrito order in which a user can choose from two meats, chicken or steak, and two beans, pinto or black. We can take it further by allowing the user to select the quantity of meat via a nested option.

- The Burrito is an
ItemNodeand is also the root ofTreeState. It has two childOptionListNodes, Meat and Burrito.- Beans is an
OptionListNodewith two childOptionNodes, Pinto and Black.- Pinto is an
OptionNode. - Black is an
OptionNode.
- Pinto is an
- Beans is an
- Meat is an
OptionListNodewith two childOptionNodes, Chicken and Steak.- Chicken is an
OptionNode
- Chicken is an
- Steak is an
OptionNodewith one childOptionListNode, Quantity, meaning it is a nested option.- Quantity is an
OptionListNodewith two childOptionNodes, ½ and 2x.- ½ is an
OptionNode - 2x is an
OptionNode
- ½ is an
- Quantity is an
Class Pattern implementation on the Item Modal
We built another contrived Item Modal example on CodeSandbox to demonstrate how we use TreeState in the burrito ordering example described above. In this walkthrough, we focus on a simple example to show off the Class Pattern. However, we also include the more complicated nested options for those interested in taking a deeper dive.
Click here to see the code sample in CodeSandbox.
We expose a useTree hook in a similar manner to how we implemented useTodo in our TodoList example above. useTree interacts with TreeState, exposing selectors for currentNode and mutation functions for selecting and unselecting options, and building the initial tree.
Click here to see the code sample in CodeSandbox.
Building the initial tree
The first critical part to render the Item Modal is building the initial TreeState with item data, as shown in Figure 5, below.

- Item Modal - We initialize the useTree hook on the initial render, exposing
buildTree,currentNode,selectOption,unselectOption,setCurrentNode(not covered in this walkthrough), andaddTreeNodes(also not covered in this walkthrough). When we initialize theuseTreehook, theTreeStateis in its default state, withcurrentNodeundefined, root undefined, andnodeMapset to{}. - Item Modal - A
useEffecthook will trigger and detect thatcurrentNodeis undefined and fetch item data and callbuildTreeexposed fromuseTreewith the item data. However, in this Class Pattern example, we will omit the API call implementation and use mock data (found in TreeState/mockData). Item API Responseis received -buildTreedispatches aBUILD_TREEevent to be handled bytreeReducer.- treeReducer makes a deep copy of the current
TreeStateand then callsTreeState.handleTreeAction
const TreeReducer: Reducer<TreeState, TreeAction> = (treeState, treeAction) => {
 const newTreeState = cloneDeep(treeState);
 newTreeState.handleTreeAction(treeAction);
 return newTreeState;
};
Click here to see the code sample in CodeSandbox.
TreeState.handleTreeActionbegins to look a lot like a typical Redux reducer with its switch statements. In the switch statement, the incoming action type matchesTreeActionType.BUILD_TREE.Here,TreeStatecreates all nodes,ItemNode,OptionListNode, andOptionNode, from the item data payload for the initial tree. We createItemNodeincreateTreeRoot,OptionListNodeincreateOptionListNodes, andOptionNodeincreateOptionNodes.
Click here to see the code sample in CodeSandbox.
The critical piece here is that the nodes are created with the correct pointers to their children and parents. The Burrito ItemNode’s children are Meat and Beans, which are in turn OptionListNodes with Burrito as their parent. Meat’s children are Chicken and Steak, which are also OptionNodes with Meat as their parent. Beans’ children are Pinto and Black with Beans as their parent.
TreeReducer- The initialTreeStateis now updated and built, triggering a re-render in the web application component which renders the currentNode, as shown in Figure 6, below:
After we request the item data payload, there are a lot of moving parts involved in building the initial TreeState, and a lot of places where things can go wrong. The Class Pattern allowed us to easily write tests for different types of items and check that the TreeState was built correctly.
In the example below, we write a suite of tests for our Burrito ordering use case to make sure that all the relationships and initial validity are correct between the ItemNode, OptionListNodes, and OptionNodes. We think of these as “integration” tests as they test the entire side effects of a reducer action as opposed the “unit” tests that we wrote to test the business logic of ItemNode, OptionListNode, and OptionNode. In production, we have our suite of unit tests for all types of item data payloads, such as reorder, default options, and nested options.
const treeState = new TreeState();
   treeState.handleTreeAction({
     type: TreeActionType.BUILD_TREE,
     itemNodeData,
     optionListNodeDataList: optionListData,
     optionNodeDataList: optionData
   });
   it('Burrito should be the parent of Beans and Meat and Beans and Meat should be Burrito"s children', () => {
     const burritoNode = treeState.getRoot();
     burritoNode?.getChildren().forEach((optionListNode) => {
       expect(
         optionListNode.getName() === "Meat" ||
           optionListNode.getName() === "Beans"
       ).toBeTruthy();
       expect(optionListNode.getParent()).toBe(burritoNode);
     });
   });
Click here to see the code sample in CodeSandbox.
We have tests for all the business logic at every level of the Item Modal, covering each node level and the TreeState in the CodeSandbox below. After building a tree, we have tests that make sure that every single node is initialized correctly.
Click here to see the code sample in CodeSandbox.
How the Item Modal interacts with the TreeState
The TreeState is critical to every aspect of the Item Modal. It is involved in the Item’s Modal’s rendering, client-side validation, and data fetching. Every user interaction results in a change to the TreeState.
Rendering
With the class pattern and TreeState, the Item Modal rendering has become dead simple as we have an almost one-to-one relationship between the markup and state shapes. ItemNode renders as an Item component, OptionListNode renders an OptionList component, and OptionNode renders an Option component.
The Item Modal can be in two different states: the initial item page or on a nested option page. We won’t cover the nested option case here but we determine what type of page to render by using Type Guards.
For the initial item page, we render an ItemBody component, which accepts the currentNode, selectOption, and unselectOption as properties. ItemBody renders the name of the item, maps its children and renders OptionLists, and renders a submit button that can only be interacted with when all the options meet the correct validation criteria.
 {itemNode.getChildren().map((optionListNode) => (
       <OptionList
         key={optionListNode.getId()}
         optionListNode={optionListNode}
         selectOption={selectOption}
         unselectOption={unselectOption}
         setCurrentNode={setCurrentNode}
       />
     ))}
Inside ItemBody, the markup is really simple because we just render the ItemNode’s children which are OptionListNodes as OptionList components, as shown in this CodeSandbox code sample.
The OptionList component accepts optionListNode, selectOption, unselectOption, and setCurrentNode properties. Following these inputs, OptionList renders its name, determines whether the OptionListNode is valid, and maps its children, which renders Options.
{optionListNode.getChildren().map((optionNode) => (
       <Option
         key={optionNode.getId()}
         optionNode={optionNode}
         selectionNode={optionListNode.getSelectionNode()}
         selectOption={selectOption}
         unselectOption={unselectOption}
         setCurrentNode={setCurrentNode}
       />
     ))}
Click here to see the code sample in CodeSandbox.
The Option component accepts optionNode, selectionNode, selectOption, unselectOption, and setCurrentNode properties. selectionNode is the dynamic part of the form and determines whether a radio button or checkbox is rendered. SelectionNodeType.SINGLE_SELECT renders a radio button
Click here to see the code sample in CodeSandbox.
SelectionNodeType.MULTI_SELECT renders a checkbox.
Click here to see the code sample in CodeSandbox.
Interaction via selectOption and unselectOption
The whole point of the Item Modal is to save and validate a user’s inputs and modifications to an item. We use selectOption and unselectOption functions exposed from useTree to capture these user inputs and modifications.

To illustrate the lifecycle of what happens when an Option’s checkbox is clicked, we will go over what happens when a user clicks the Pinto Beans checkbox from our example. The lifecycle to get to the TreeState.handleTreeAction is exactly the same as building the initial tree.

- Pinto Beans Clicked -
handleMultiSelectOptionTouchcallback is fired ononChangeevent. The callback checks if theOptionNodeis already selected. If it is already selected, then it will callunselectOptionwith its ID. Otherwise, it will callselectOptionwith its ID.In this example, it callsselectOption. selectOption- dispatches a TreeActionType.SELECT_OPTION action with an optionID payload.
const selectOption = (optionId: string) => {
   dispatch({ type: TreeActionType.SELECT_OPTION, optionId });
 };
Click here to see the code sample in CodeSandbox.
treeReducer-deep clones the current tree state and callsTreeState.handleTreeAction.handleTreeAction- we usegetNodeto retrieve the node from thenodeMapwith anoptionID.
case TreeActionType.SELECT_OPTION: {
      const optionNode = this.getNode(treeAction.optionId);
      if (!(optionNode instanceof OptionNode))
         throw new Error("This is not a valid option node");
       optionNode.select();
       if (optionNode.getNextCursor() !== undefined)
         this.currentNode = optionNode;
       return;
     }
Click here to see the code sample in CodeSandbox.
OptionNode.select- turns theisSelectedto true and callsOptionNode.validate.
public validate = () => {
   this.isValid = this.children.every((optionListNode) =>
     optionListNode.getIsValid()
   );
   this.parent?.validate();
 };
Click here to see the code sample in CodeSandbox.
OptionListNode.validate, we need to validate the user’s input and determine whether it satisfies the boundary rules set by itsminNumOptionsandmaxNumOptions. After checking the boundary rules, theOptionListNode’s parent validate is called, which is onItemNode.
public validate = () => {
   const validSelectedOptions = this.children.filter(
     (optionNode) => optionNode.getIsSelected() && optionNode.getIsValid()
   ).length;
   this.isValid =
     this.satisfiesMinNumOptions(validSelectedOptions) &&
     this.satisfiesMaxNumOptions(validSelectedOptions);

   this.parent?.validate();
 };
Click here to see the code sample in CodeSandbox.
ItemNode.validate- validation is similar to anOptionNode’svalidation. It checks to see if all of its children are valid to determine if theItemNodeis valid, but it doesn’t call its parent to validate as it is the root of the tree.
public validate = () => {
   this.isValid = this.children.every((optionListNode) =>
     optionListNode.getIsValid()
   );
 };
Click here to see the code sample in CodeSandbox.
- Burrito - not valid, beans - valid, pinto beans - not valid - Our TreeState is updated with Pinto Beans as selected, and its parent node, Beans, and grandparent node, Burrito, have been validated. This state change triggers a re-render and the Pinto Beans option shows selected, while Beans changes from not valid to valid.
Clicking Pinto Beans works just like building the initial tree. When a user clicks an option, we need to make sure that the TreeState is updated and all of our ItemNodes, OptionListNodes, and OptionNodes are correctly set as invalid or valid. We can do the same with the initial build tree action and initialize a TreeState, fire off the select option action, then check all of the nodes to verify that everything is correct.
Click here to see the code sample in CodeSandbox.
Brief validation explanation
For any user interaction, we need to recursively climb up the tree from where the user interaction initiates, as this interaction can result in that node becoming valid and affecting its parent’s validity, and its parent’s parent’s validity, and so on.
In the Pinto Beans example, we have to validate starting from the Pinto Beans node. We first see that it does not have any children so, as a leaf node, it is immediately valid. Then we call validate on Beans because we need to check if a valid isSelected = true Pinto Beans node can fulfill our Beans boundary conditions. In this example, it does, so we flag Beans as valid and then finally we call validate on Burrito. On Burrito, we see that it has two OptionListNodes as children and Beans is now valid. However, Meat is not valid, which means Burrito is not valid, as shown in Figure 9, below:

Figure 9: For each node, pink means the node is invalid, green means that the node is valid, red means that the node was clicked and selected, and yellow means that it is validating.
How to use the Nested Options Playground
We haven’t gone through the nested options example in this code walkthrough, but the code is available in the CodeSandbox we created. To unlock the nested options example and play around with the code, please uncomment out here and here.
Conclusion
State management can get exponentially more complicated as an application’s complexity grows. As we began the migration process to microservices, we re-evaluated how data flows through our application and gave some thought on how to improve it and better serve us in the future.
The Class Pattern lets us clearly separate our data and state layer from our view layer and easily write a robust suite of unit tests to ensure reliability. After the rebuild, we leveraged the Class Pattern to build and deploy the reordering feature in late 2020. As a result, we were able to easily write unit tests to cover our new use case, making one of our most complicated features on the web into one of our most reliable.
Before, it was easy to test the entire output of an action and its side effects on the entire state but we were not able to easily get the granularity of all the moving parts (individual node validation, error messages, etc) . This granularity from the class pattern and the new ease of testing has increased our confidence in the item modal feature and we have been to build new functionality on top of it with no regressions.
It’s important as a team to find a pattern or library to commit to in order for everyone to be on the same page. For teams coping with a similar situation, where state is getting more complicated and the team is not married to a specific library, we hope this guide can spark some inspiration in building a pattern to manage the application’s state.


 JoshZhu
